Holeyboard Design Details
 Freak Thickness... or Thinness
There are many reasons Holeyboards are different but a key feature that is instantly noticeable is how thin and light they are, yet still strong and durable. Less weight to carry is a good thing, even a great thing you could say when you are loading in and out…in the snow…or rain…down two flights of stairs say. Light is good.
If you look at many products certain attributes combine together well, and some do not. Thin, Lightweight and Strong = High Tech, because it’s a difficult combination to achieve and it’s not necessarily intuitive or expected, thus it’s a delight. You would expect something thin and lightweight to be flimsy.
(FYI powder coating is the process by which you hang a metal part from a hook and send an electrical charge through the part, you then spray it with a dry powder that has an opposite charge, thus the powder sticks like glue. You then send it through an oven and the coating is literally baked on. It’s a very durable finish and is what I use )
So, I pick up the parts and my mind is literally blown away at how light, thin, rigid and strong they are. Kabaam my wheels started turning and the next day I started working with aluminum and moved my Holeyboards to that material and haven’t looked back.
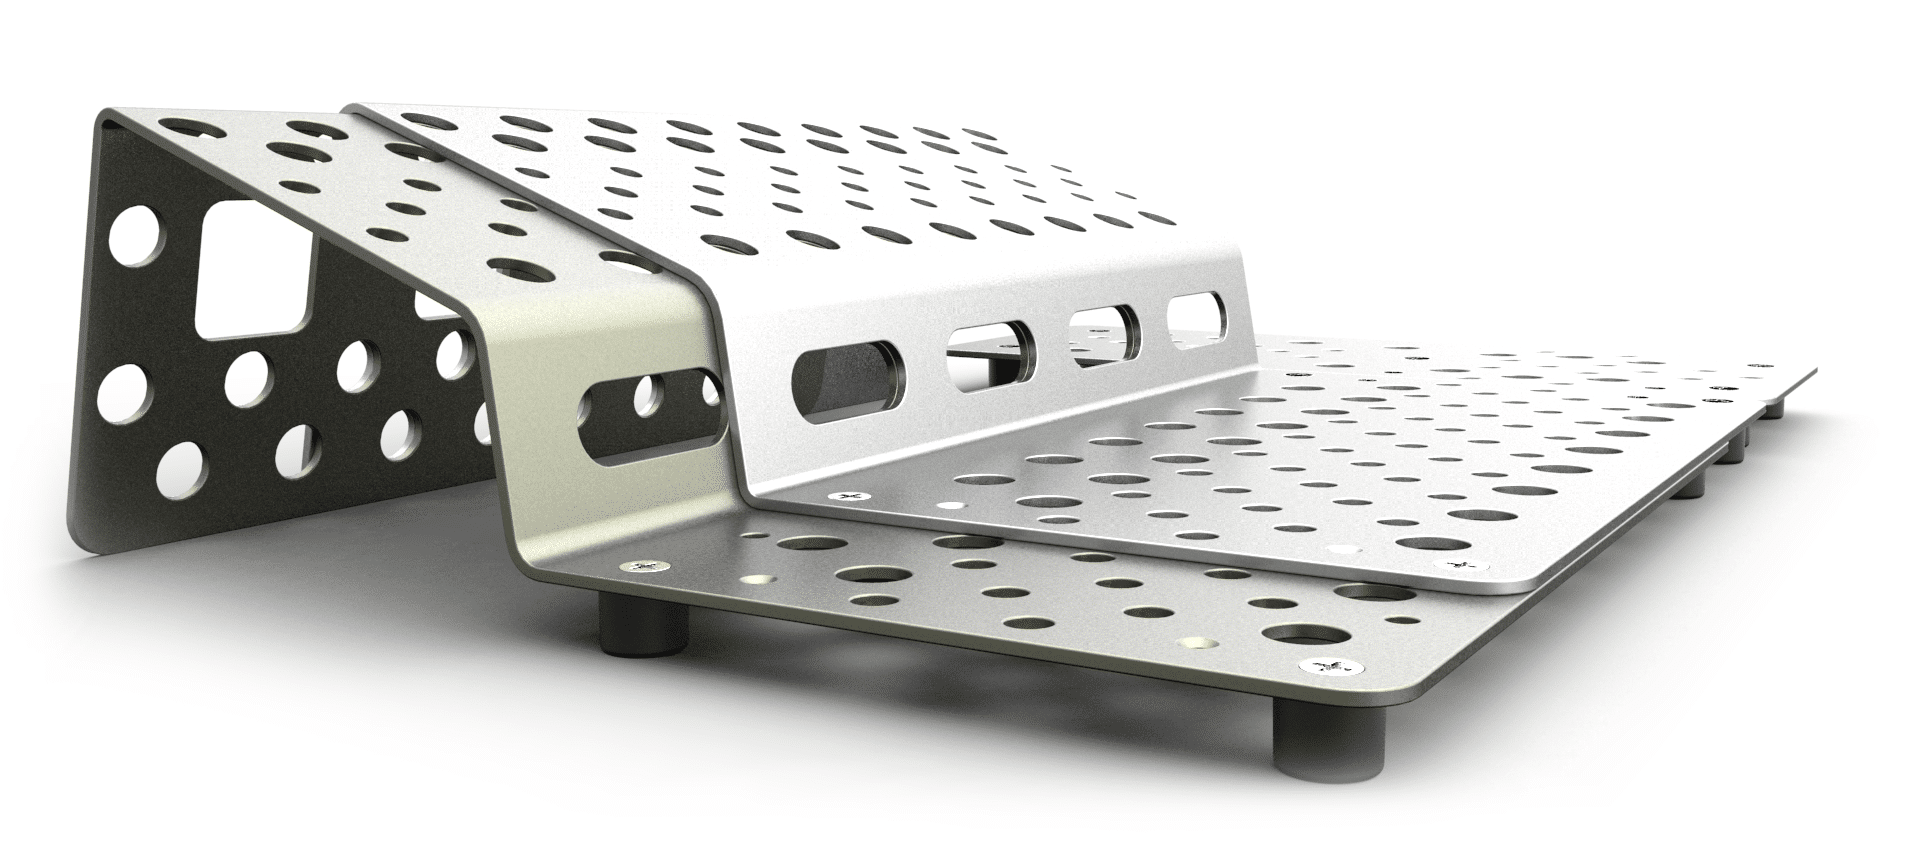
Aluminum can be soft or rigid, the magic comes in the details. The Holeyboards are 0.125” thick. In the business we pronounce that number as “one hundred and twenty-five thousandths”, it’s 1/8 of an inch. If you had a flat sheet of it you could bend it over your knee without too much trouble. But, add in bends to the material and it becomes very rigid, say maybe a Top Shelf. Then, to support the lower section so that it can be stomped on like mad, I put real, screwed on, rubber feet. The distances and number of feet aren’t by happenstance, they are engineered like the supports on a bridge. Strong, but light.
You’ve heard the saying about bridges and engineers? Anyone can build a bridge that stands up, but it takes an engineer to build a bridge that Just stands up. The difference is between thoughtful design and engineering and just hogging something together.I prefer the former.
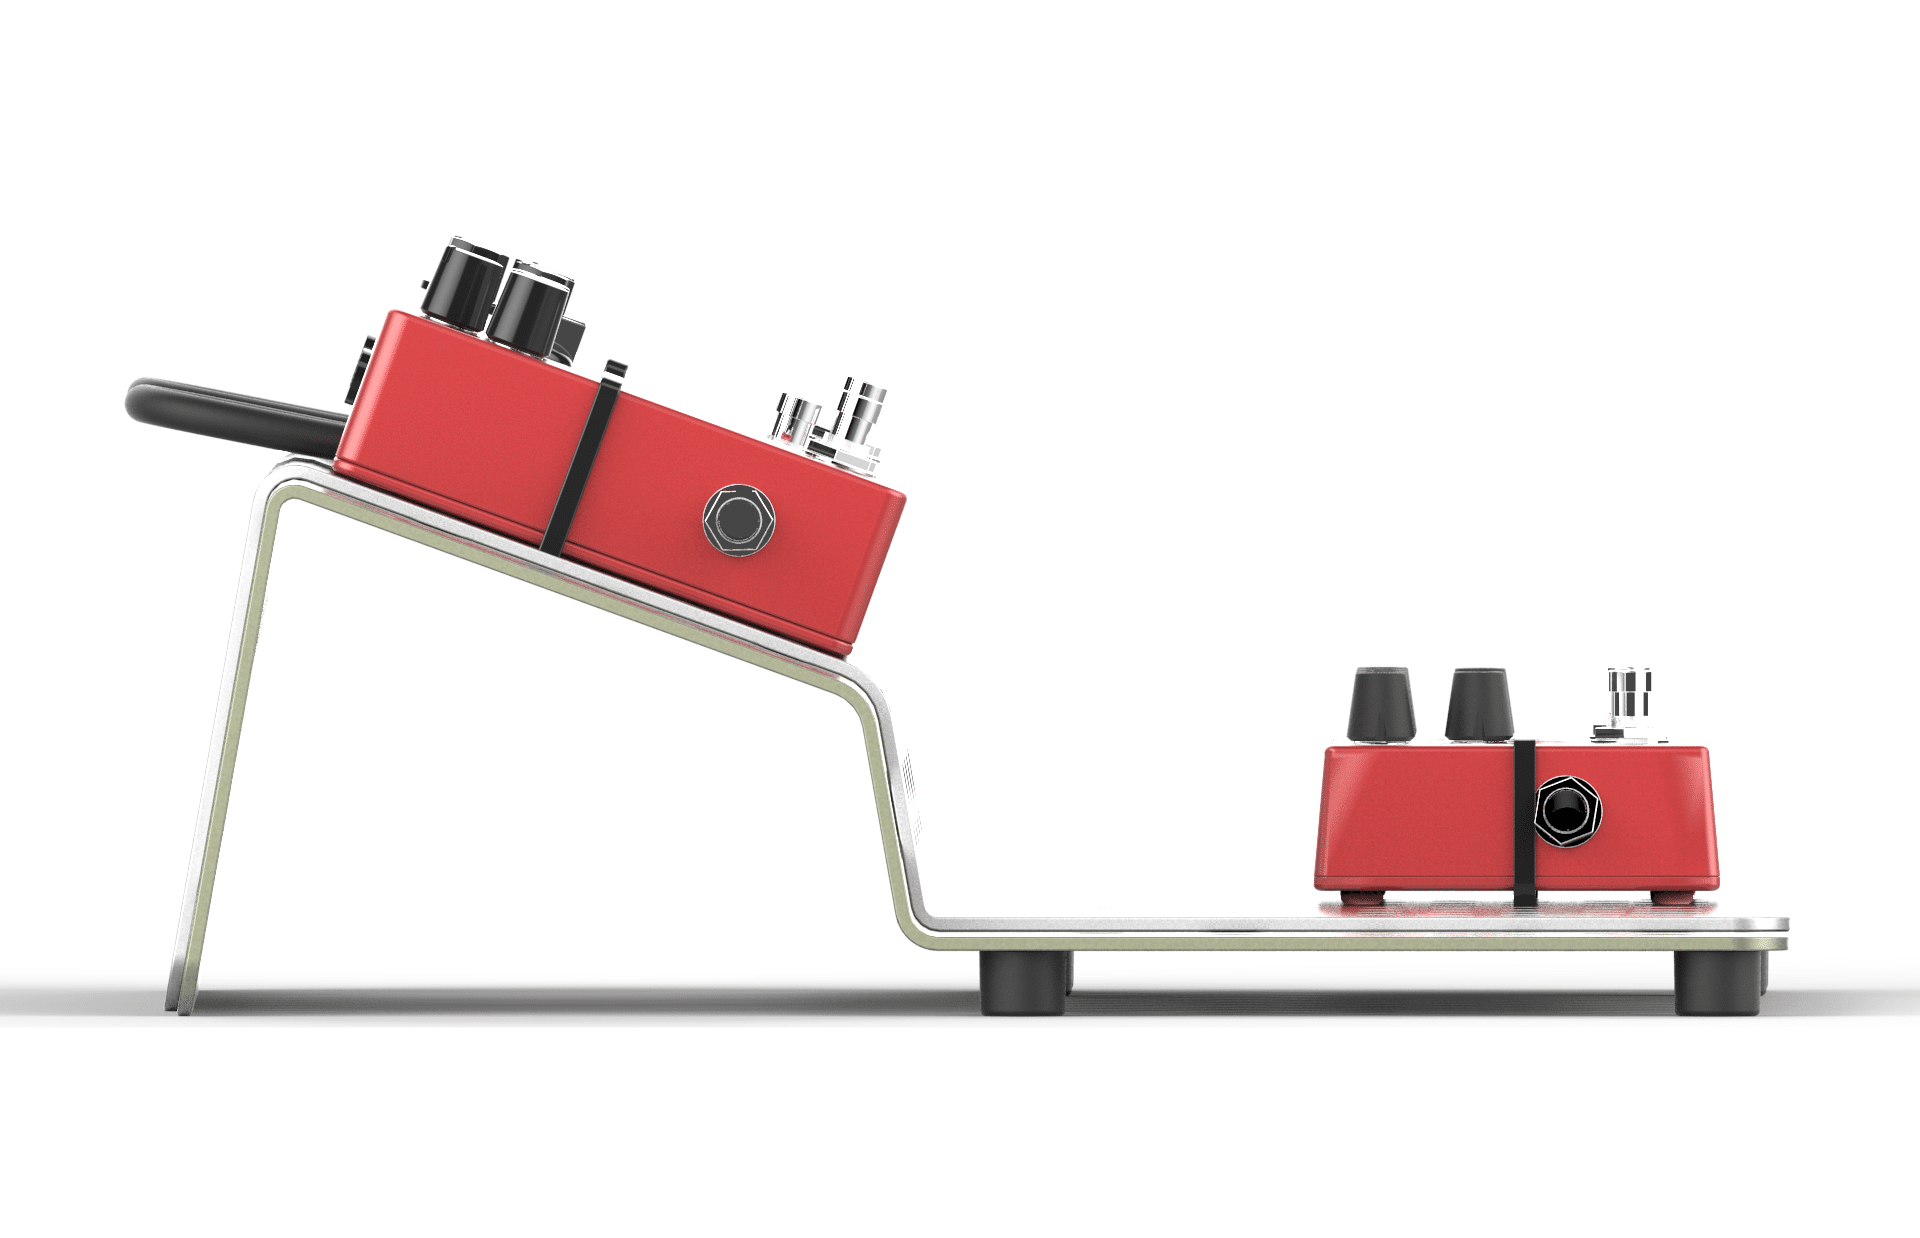
One last benefit of Thin, Strong, and lightweight: Ergonomics. The further you have to lift your foot to engage a pedal, the harder, clumsier and more uncomfortable it is. My band Romeo Delta (shameless self promotion there…) has a song called “A little More”, it’s an emotionally charged piece that goes from quiet and heartfelt to a wailing guitar crying with emotion. To go from my just-on-the-edge-of-breakup arpeggios to the wailing my OD pedal, an EP Booster, needs to be hit just at the right time. So, when I’m a couple of measures away I move over toward my Holeyboard and hover my foot over the EP Booster, so when it’s time I don’t even look I just push down. Ever do this on your songs? Because the Holeyboard is only 0.69”off the floor, my heel rests comfortably on the floor and my foot is angled up, but not too high that it makes me unbalanced. A shallow foot angle makes less fatigue and makes the press faster. It makes it easy. Ergonomics. Easy to use. That’s why the base is designed as it is. The Holeyboards are the thinnest, closest to the floor pedalboards, and there are reasons and now you know them.
On this point, important, patch cables, I’m talking the 1/4” patch cables that go pedal to pedal are not designed to go under the Holeyboard against the floor. Read all of the above as to why. They will get damaged, it’s rough on the cables and it would make the board higher off the ground and harder to use. So try it and you might find it’s amazing, they just lay on top. Super clean, easy to change out, safe. 9 and 12v tiny power cables however do route easily underneath.
Why Two Levels? What’s wrong with one flat surface mounted on the floor at an angle?
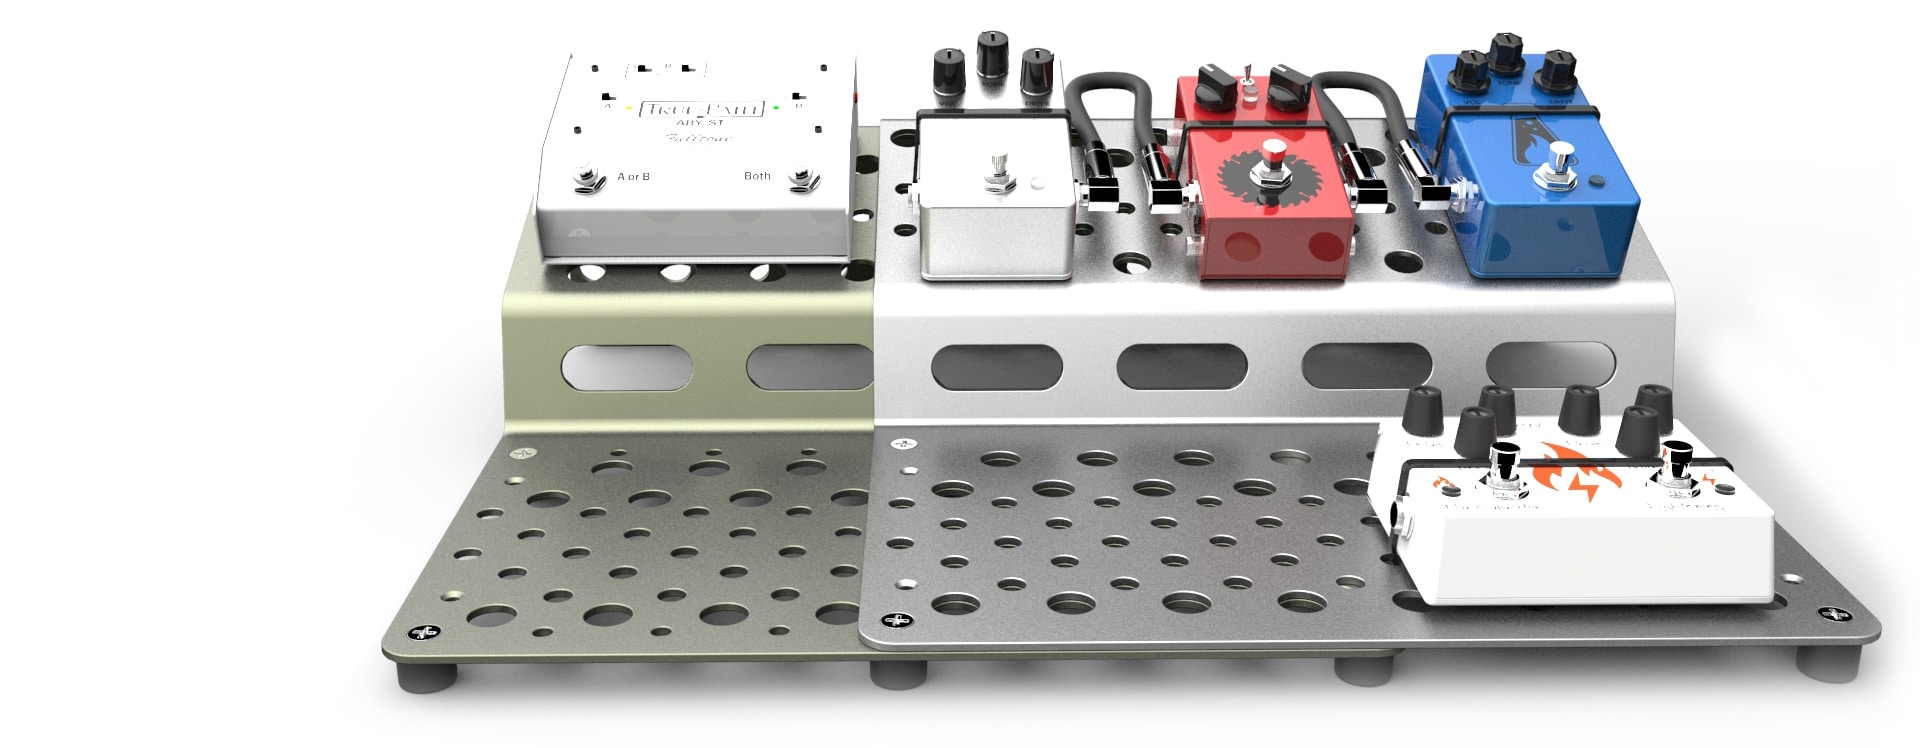
I invented the Top Shelf on a pedalboard way back in 2004. The second shelf gives you three things:
1) Makes it easier to hit pedals quickly and accurately in the back row
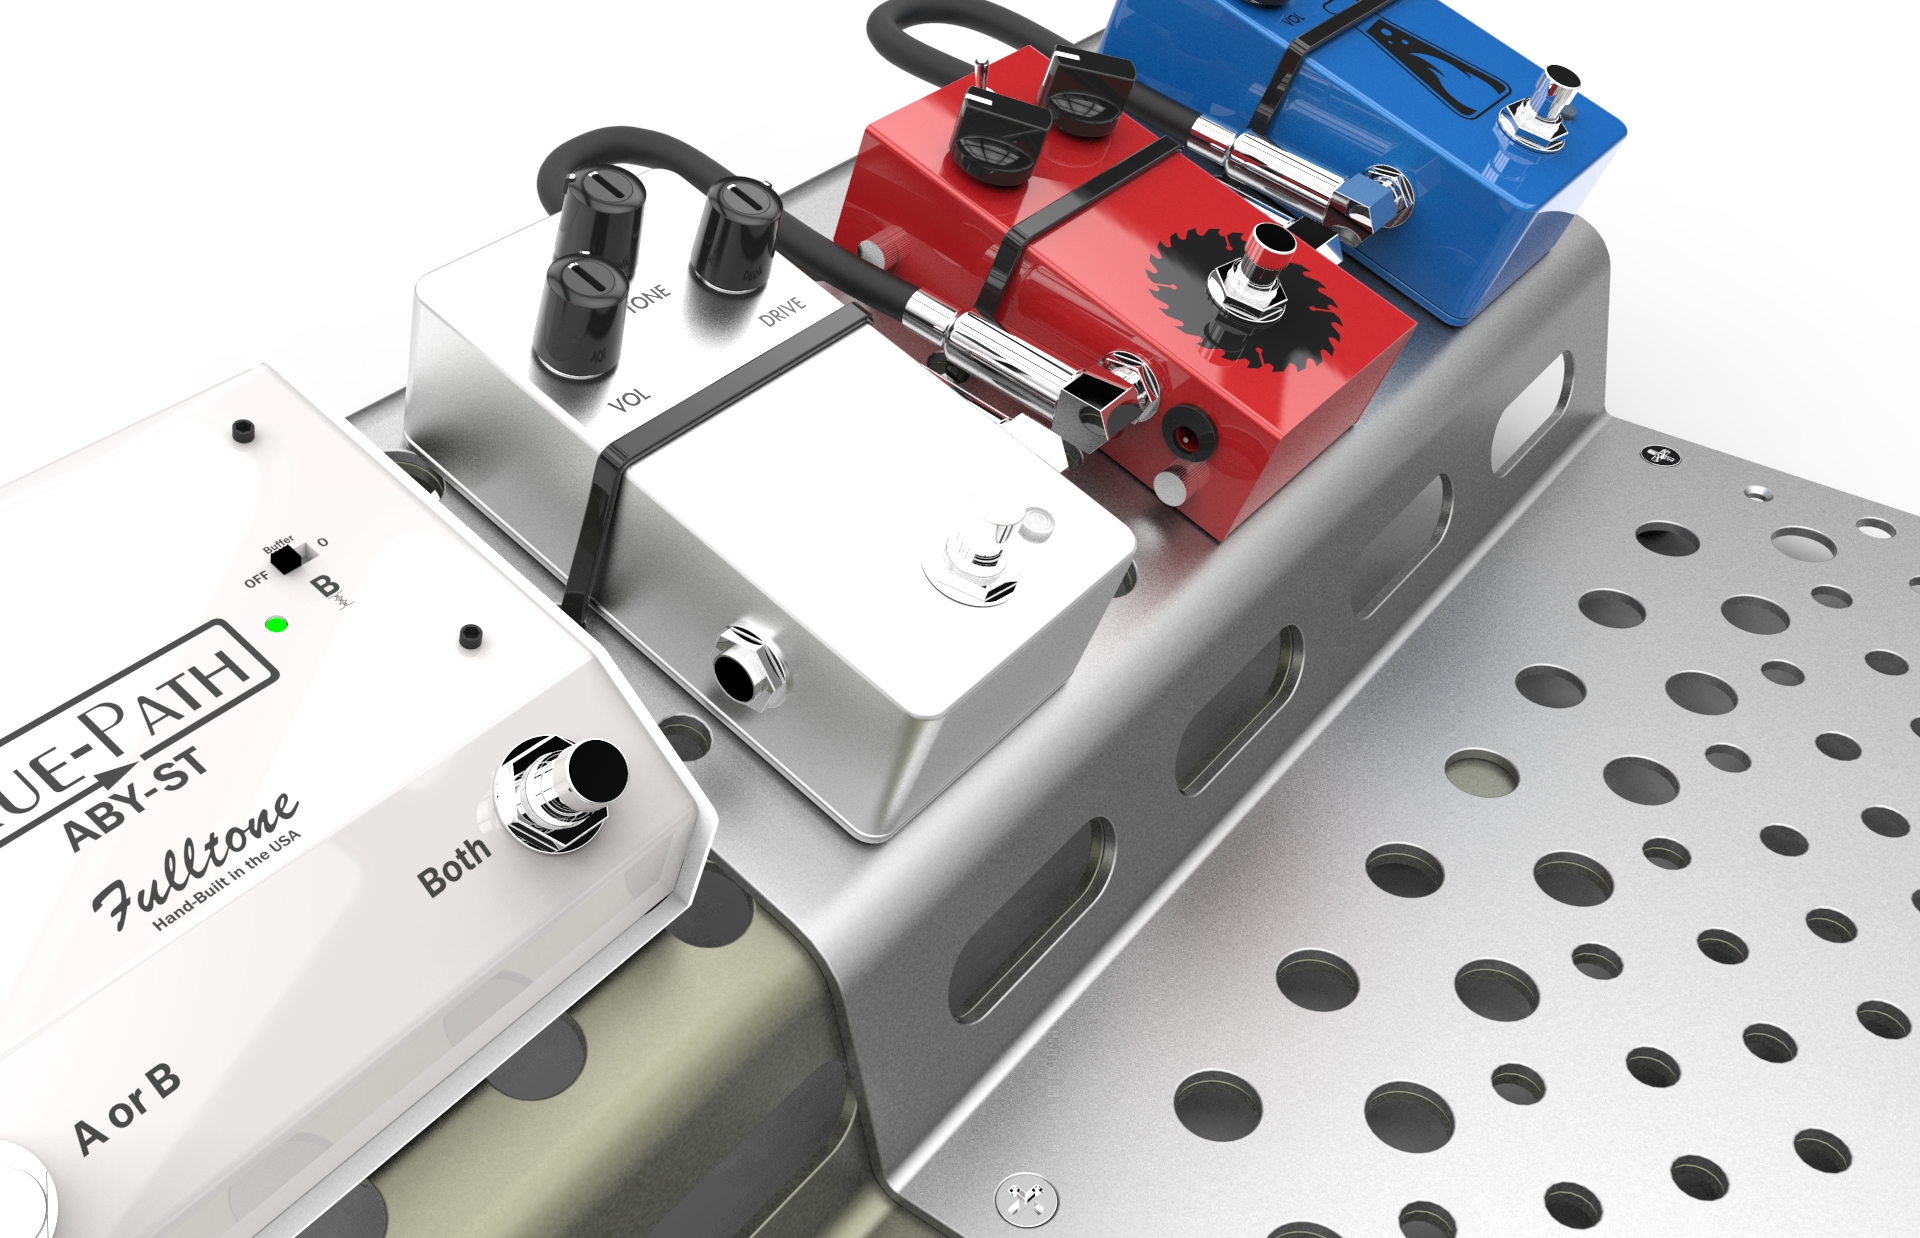
Stand up (go ahead now, try it) and without bending your knee, lift one of your feet so it swings forward. Swing it back, now do it again. It’s moving in an arc, from low to high. Without getting into the math, that is a calculable arc and angle of rise. If you add in the average height of effects pedals you can combine the two to make a Top Shelf that is both above the height of the pedals on the front row (so you don’t accidentally engage them) and is at the optimal height for lifting your foot following the natural arc, and is also at a very specific angle. Easy, Fast, Accurate.
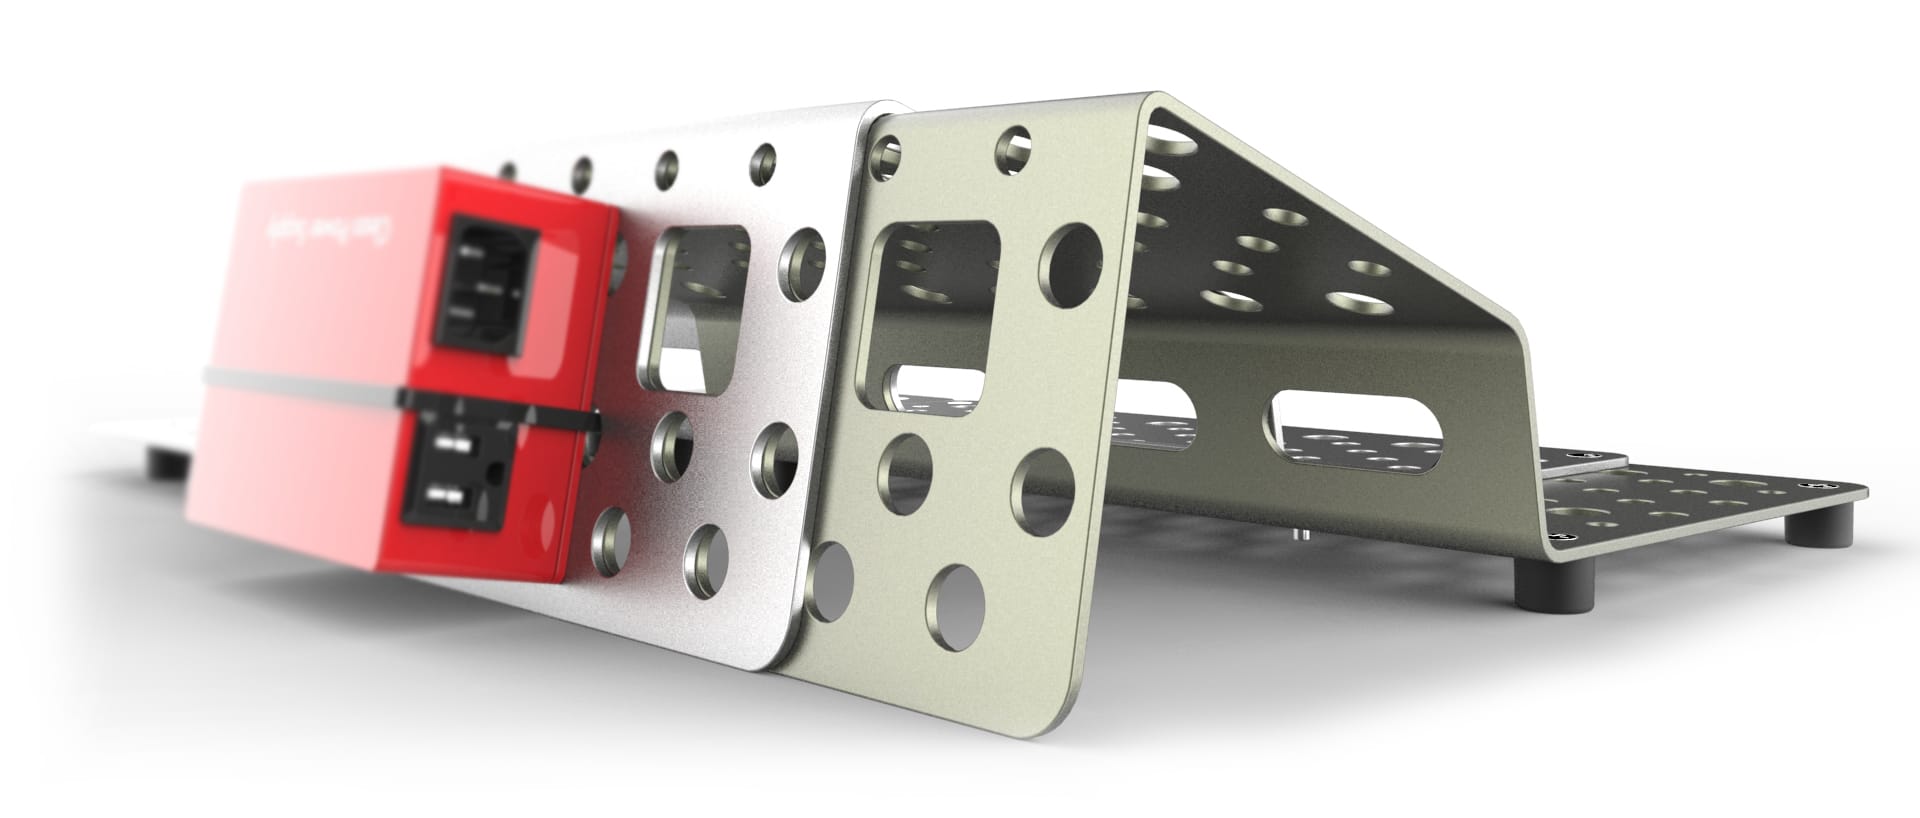
2) Gives a nice place to mount your power supply. I’m not going to lie, this was a happy accident. When I started designing my first Holeyboard I was using, gasp, batteries. I know some of you still like batteries but with five kids and chaos 24/7, there’s no way I can show up at a gig with batteries. Also, the new power supplies are pretty amazing, it’s a level up. So the Top Shelf gives you a nice home right underneath for your power. Perfectly located and out of the way.
3) Natural handles to pickup your Holeyboard. I was the first to put handles on pedalboards. My original Holeyboard Standard had one on the side and one on the top. This was done for two reasons, the first is that pedalboards are weird, ungainly beasts when loaded with pedals. The pedals are by nature different sizes and weights with cables everywhere. You are usually stressed out, trying to get on or off stage or get home from practice. It’s nice to have a handle!
Second reason I put them on originally was that I read an article about Jonny Ive, the guy from Apple who designed the original Bondi Blue imac. If you were born way back then you might remember it, it had a giant handle right on top. Now he acknowledged that most people don’t move a desktop computer around all the time, otherwise they’d buy a laptop. Why the handle then? The handle was a visual cue to your subconscious that you could pick it up and move it and thus you had control over it. In theory it made people more confident about their purchase and use of the original imac. Pretty interesting huh? I thought so.
So, to the Holeyboard 123 (pronouced “one, two, three”, I just have grown weary of typing the commas…) it does not have big, obvious handles, but it does have them. I wanted to create the best of everything I’ve learned and one big learning, and flaw with the early curved models, is that space is of a premium on stages, at rehearsal, at church, in your man cave, in bedrooms and wherever pedalboards live. Compact is good. So I the Top Shelf, more specifically the two side edges, on the left and right, of the Top Shelf are a natural handle. Easy to grab, even when loaded with pedals. Now you know.
See you on the dark side... of the Holeyboard...
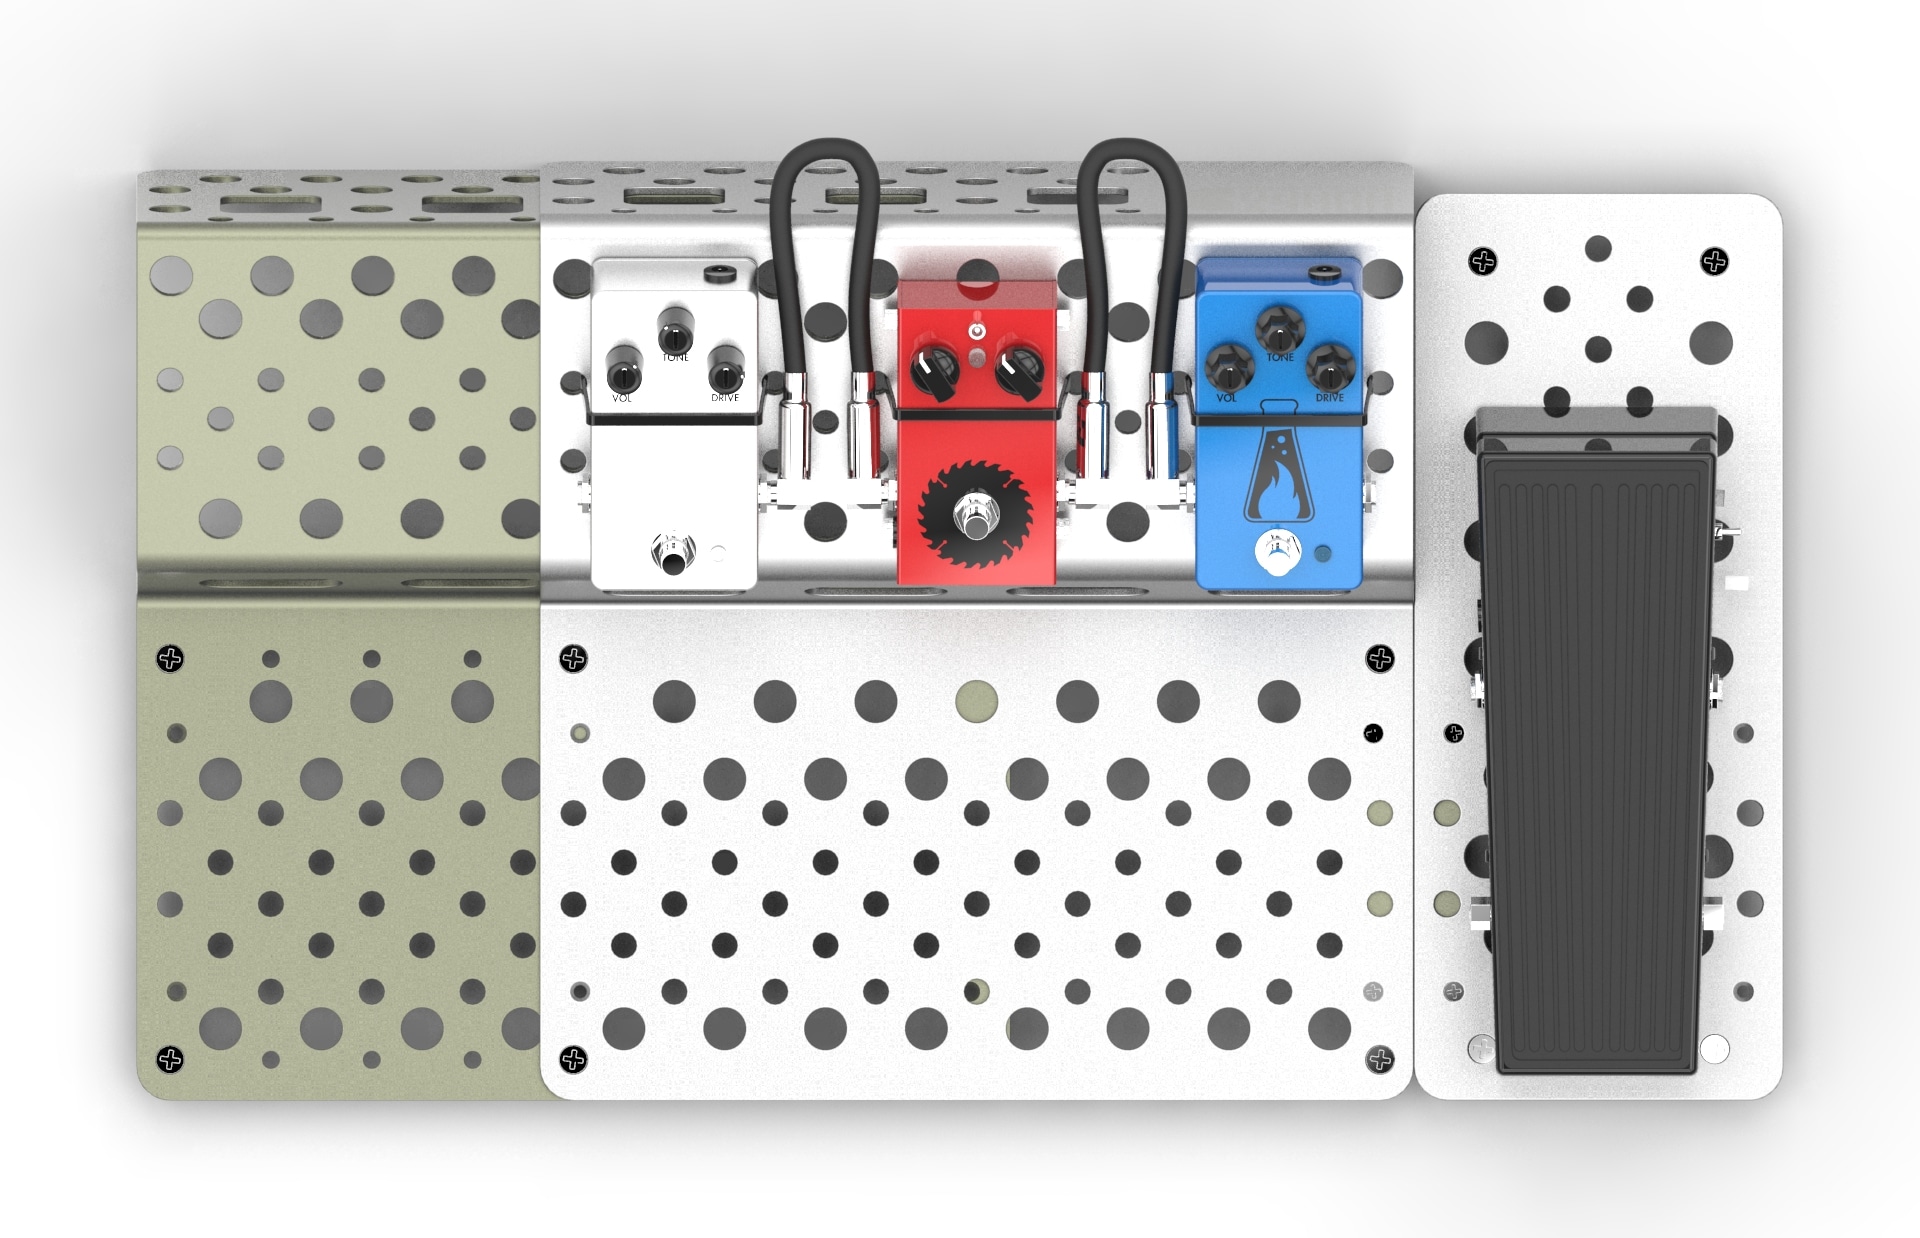
The back has a different job and as such it gets different stuff. You’ll notice it has a hole pattern but quite different from that of the top surface. Most noticeably are the large rectangular holes with rounded corners. I have five words for you: fits all power plugs, easily.
As we discussed above, underneath the Top Shelf is one of the places where you can mount your power supplies. As all power supplies are different and believe in freedom of choice for your power supplies, we need to fit them all. Some have the cord and power plug on the ends with the 9 and 12v jacks coming out the sides and some are in reverse. So, rest assured, whatever way you mount yours, you can get to your cords.
Also on the back are many round holes, these are for mounting your power supplies on the back, on the outside, or the inside. I find that mounting it on the back with my 9 and 12v outlets facing up is ideal for what I call, “demo mode”. You are working out a new setup, maybe changing one two or five of the pedals in and out and it’s easy to plug one in, test it and unplug it.
And alas, magically, as you expand and contract the Expansion Module one Holeyboard 123 you will see the holes all lineup, planned. Designed. Easy to use.
Custom Sized, to fit your needs
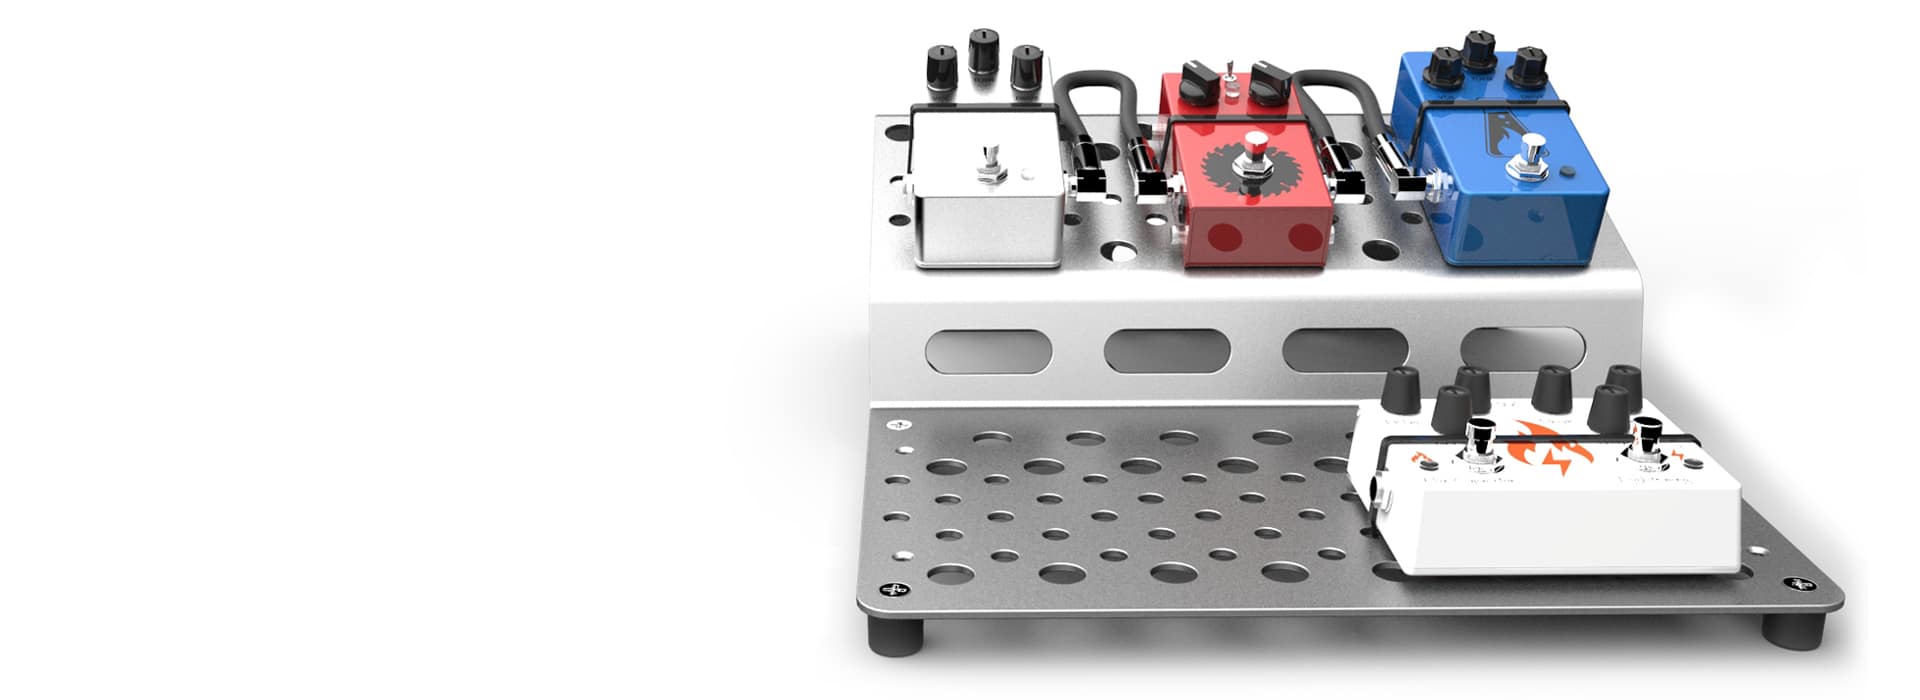
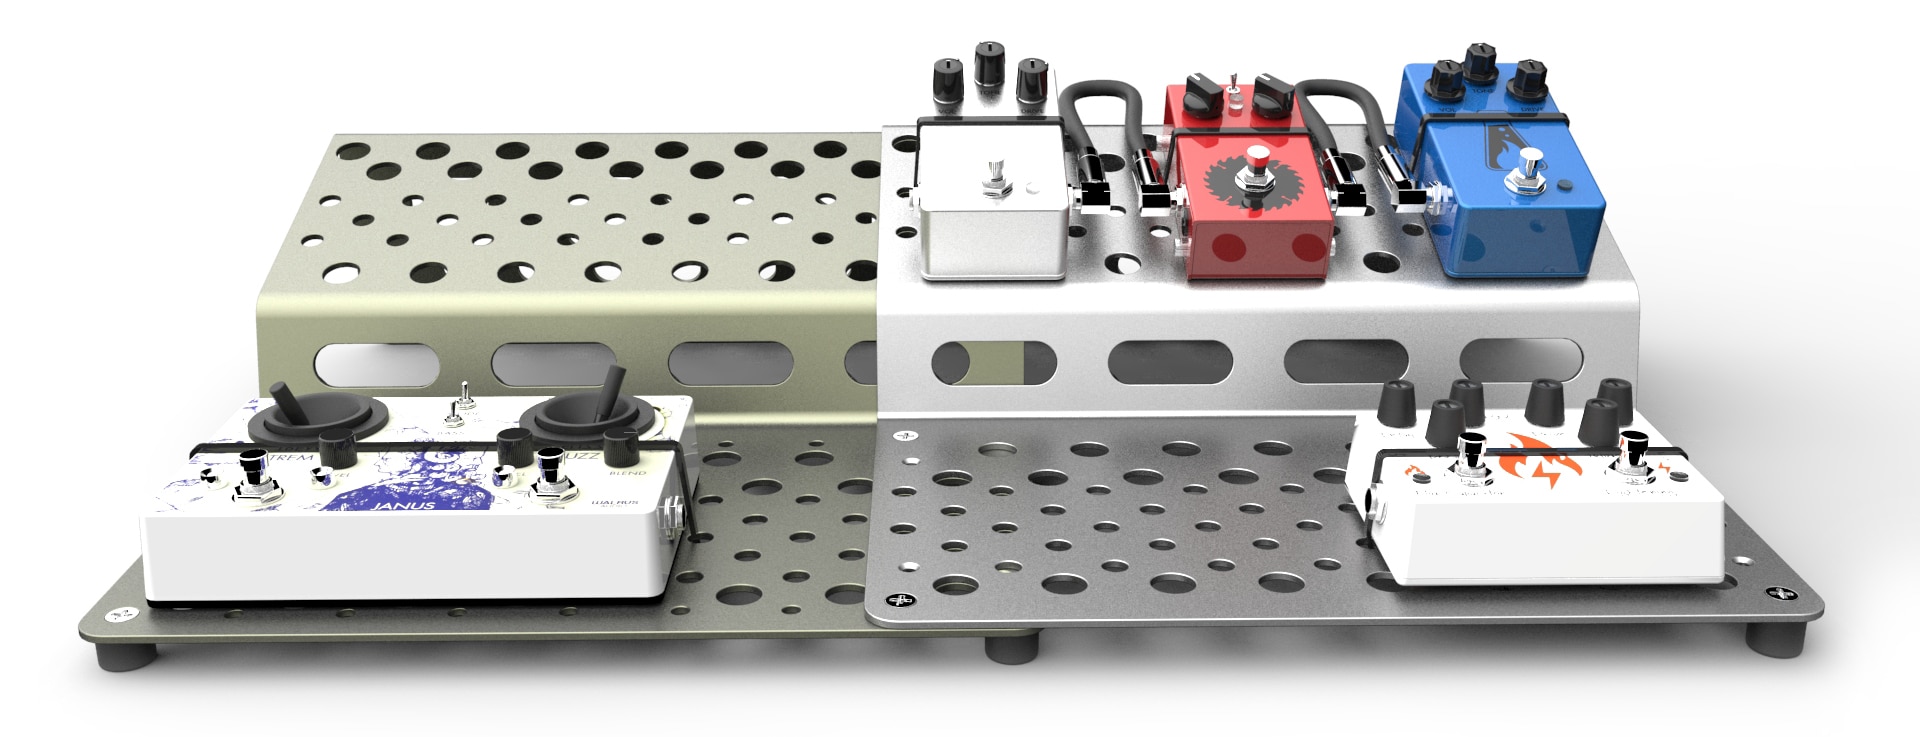
The Holeyboard Dragonfly introduced the world to the patented ability to expand and contract the size of a pedalboard. Amazing. It however only allowed you to adjust it in width to three pre-set sizes. Holeyboard 123 is better, it allows you to adjust to 8 positions at 1.5” increments, to get it exactly how you want it to fit your needs.
Also, as a second joyous benefit, it only requires moving two screws to adjust the width. Quick and Easy.
Last, it is literally infinitely expandable in width. Expansion Modules (I call them #2) attach easily to the left or right side of the Base Module (#1). You can add as many as you want to get the width you need.
Custom Real Rubber Feet
The observant few will notice that indeed, to accomplish the magical, some say mysterious, action of expanding and contracting the Holeyboard 123 at will for your own personal pleasure and gain, the one part slides over the other part. Correct. Module #2, or just #2 for short, slides under #1. So, there is then 0.125” (remember how we pronounce that?) difference in height. If we used the same rubber foot on both sections it would wobble, a lot. So, we have two custom sized rubber feet, designed by me and built by me.
I’m going to go out on a limb and say I’m often not fond of adhesives. Because they just don’t last. How many of your pedals have their adhesive rubber sticky little bump feet still on them? Right. The Holeyboards always have, and always will have real, screwed on, durable rubber feet. They are not coming off.
By both serendipity and many cups of coffee I invented the idea of pushing an M6 hex nut into a hole on one side of the foot that is deep an slightly undersized so it grips the nut firmly, so that you can put a screw through the top side of the Holeyboard into said rubber foot and it engages the nut, tightens, and holds. All without additional parts or height. It was to keep it thin baby, and it works.
The rubber feet also keep you pedals way from things like spilled stuff, which is good. And also your Holeyboard won’t slide on stage, good things.
Stainless Steel Hardware
I’m not infallible and sometimes you have to make mistakes in order to get back on the right path. About three years ago I was reading some article on optimizing manufacturing and profitability and stuff and I said, “I’m going to look at every penny I spend, let’s start with the screws, nuts and washers!”
I found that I could save quite a bit, in cents, by moving to zinc, much cheaper. And by starting small with savings I would increase my profitability. I did it, I switched, I shipped, then I cried.
As is often the case I had a gig with my band Romeo Delta coming up and picked out the latest and greatest Holeyboard I had on the shelf that I was currently making. I like to change things up often and constantly make sure everything is working and also see if I can make them even better. So, I’m tightening a screw with my drill, as we all do, and it over tightens and then quickly….strips. Junk. Not worth it. I quickly changed back to all stainless steel hardware and learned my lesson. Don’t skimp, especially on the details.
Few things are as enjoyable as the simple pleasure of bolting things together. Assembly of the Holeyboards takes only minutes, but it’s a solid, quality assembly. From soup to nuts, hex nuts that is.
Hole Pattern: To Zip-Tie® or Velcro®
“The gods do not deduct from man's allotted span the hours spent in fishing”. ~Babylonian Proverb
That was cross-stitched by my mom on a pillow in our living room when I was growing up, it’s for all you fishermen out there. Sometimes, I like to change the last part of the sentence from “in fishing” to “thinking about holes”. I have spent many, many, many hours thinking about holes, sketching holes, drilling holes, talking to people about making holes, testing holes. A hole lot of time! Jk.
Seriously though, the Holeyboards fit pedals of all sizes easily due to a lot of time and sweat invested in making it work. We have patents pending on our latest hole pattern that is on the Holeyboard 123 and I couldn’t be more excited.
A minute or two about cable ties. It’s not a secret that I think that cable ties are one of the best inventions of the 20th century. One of the reasons I invented the Holeyboards in the first place was to get away from hook & loop and adhesives. I used to buy and sell a lot of pedals, by used to I mean I still do.... You get more for your pedal without the back side all gacked up with adhesive. Cable ties hole Quick, Tight, and Fast. It’s a glorious experience and one I think you will enjoy. The work on the holes was to make them work as well as they possibly can and for your Holeyboard to have the layout you want, where you want it, easily.
Now, there is something new in the air this time around. Being a reasonable individual open to new ideas I know that many many people enjoy hook and loop and they are all ready set up to use that, or they are perhaps a little curious about cable ties but are hesitant to jump ship entirely. Or last, sometimes, every once in a while, you want to stick some sticky something or other on there. All of that is ok and it’s why I went to great lengths to accommodate, and even cater to, hook and loop as well as cable ties.
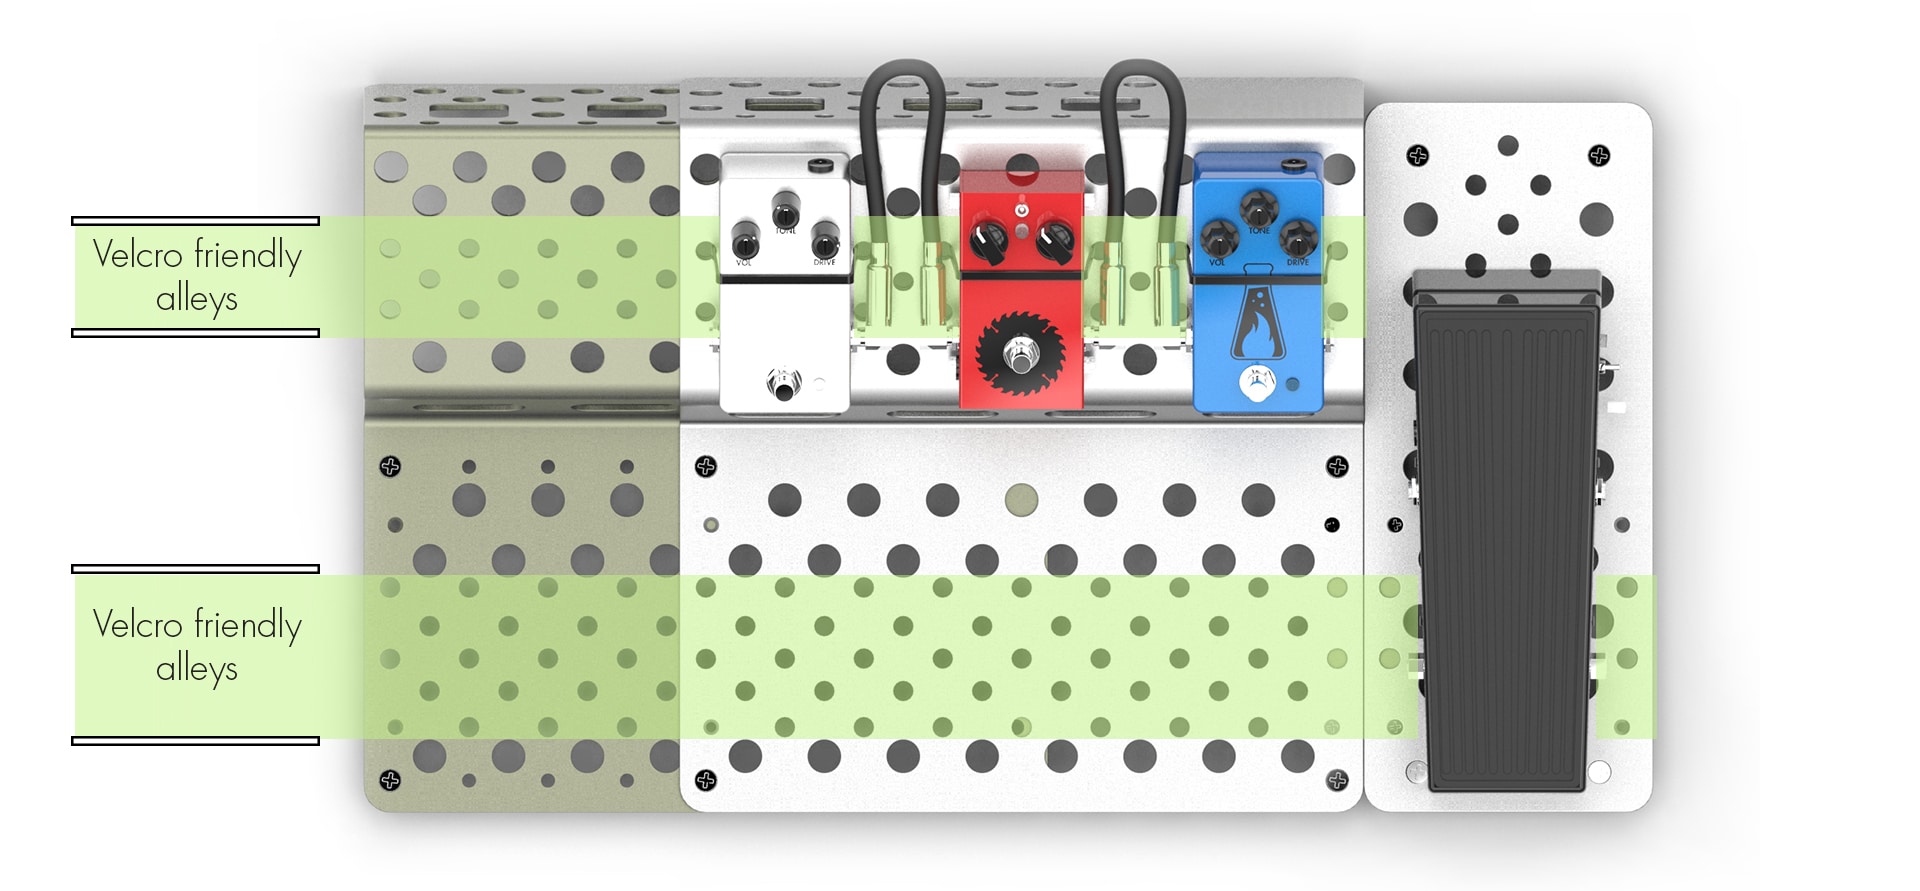
That’s right, a little bit of engineering pixie dust and a whole bunch of time testing prototypes and then testing some more and our new hole pattern has a “Velcro Friendly” channel on the top shelf and the bottom shelf. It fits a nice strip of 2” wide or narrower Velcro as you do and if you want to roll that way you get all the other benefits of Holeyboards. And while you are doing that, give a cable tie a chance, you might find you like it.
Again, I want to make your life easier while playing with your pedals, literally and figuratively. Easy is fast, easy is accurate, easy holds tight and easy is good.


